
Your Google Shopping product titles are probably holding you back. They are the single most important factor Google uses to match your products to the keywords people search for in Google Shopping. Better titles mean more keywords targeted, which means more clicks, and more sales.
But optimising hundreds or thousands of product titles by hand? It is a real pain. That is exactly why I built a free AI plugin called the Product Title Optimiser. I have applied this to client accounts and seen up to a 2x increase in shopping traffic right off the bat.
It is completely automatic, easy to set up, and completely free. Let me walk you through exactly how it works and how to set it up from scratch.
What the Product Title Optimiser Actually Does
The Product Title Optimiser is a free plugin for Claude Cowork, which is Anthropic's AI agent platform for business users. Once installed, it connects to your Google Ads account, pulls your actual search term data, researches keywords from multiple sources and tools, and generates optimised titles automatically, plus a research report so you can check its workings.
Once everything is set up, you literally just type "optimise my product titles" and it handles the rest.
This is not the kind of AI chatbot you are probably used to. Claude Cowork is part of a new generation of AI agents that can connect to tools, download data, and complete real work on your behalf. We are talking about work that would take a human days, possibly weeks, and Claude Cowork will finish it in minutes.
Step 1: Download and Set Up Claude Desktop
First, head to claude.com/download and install the Claude desktop app. Create an account if you need to, log in, and you will land on a screen that probably defaults to chat mode.
Here is the important bit: tab over to Cowork. This is what turns Claude from a regular chatbot into a proper AI agent that can do real work for you.
Step 2: Download the Plugin
Head to the GitHub page and click the Code button, then Download ZIP. That is the plugin file you will upload shortly.
If you need a written version of the full tutorial, it is all in the README file on that same GitHub page, so you have a handy cheat sheet to guide you through.
Step 3: Connect Your Google Ads Data via Go Marble
Before uploading the plugin, you need to set up Go Marble, a free tool that bridges Claude Cowork and your Google Ads data.
Head to Go Marble, log in, and create an account using the same Google account you use for your Google Ads campaigns. Once you are in, click Connect your data source and select Google Ads. Authenticate with the same Google Ads account, then make sure the correct ad account is selected.
The key point here: if you only connect one data source (your Google Ads account), Go Marble is free forever. That is specifically why I chose it as the connector.
Step 4: Install the Plugin in Claude Cowork
Back in Claude Cowork, click Customise in the sidebar, then navigate to Plugins. Click the plus button, select Create Plugin, then Upload Plugin, and find that ZIP file you downloaded from GitHub.
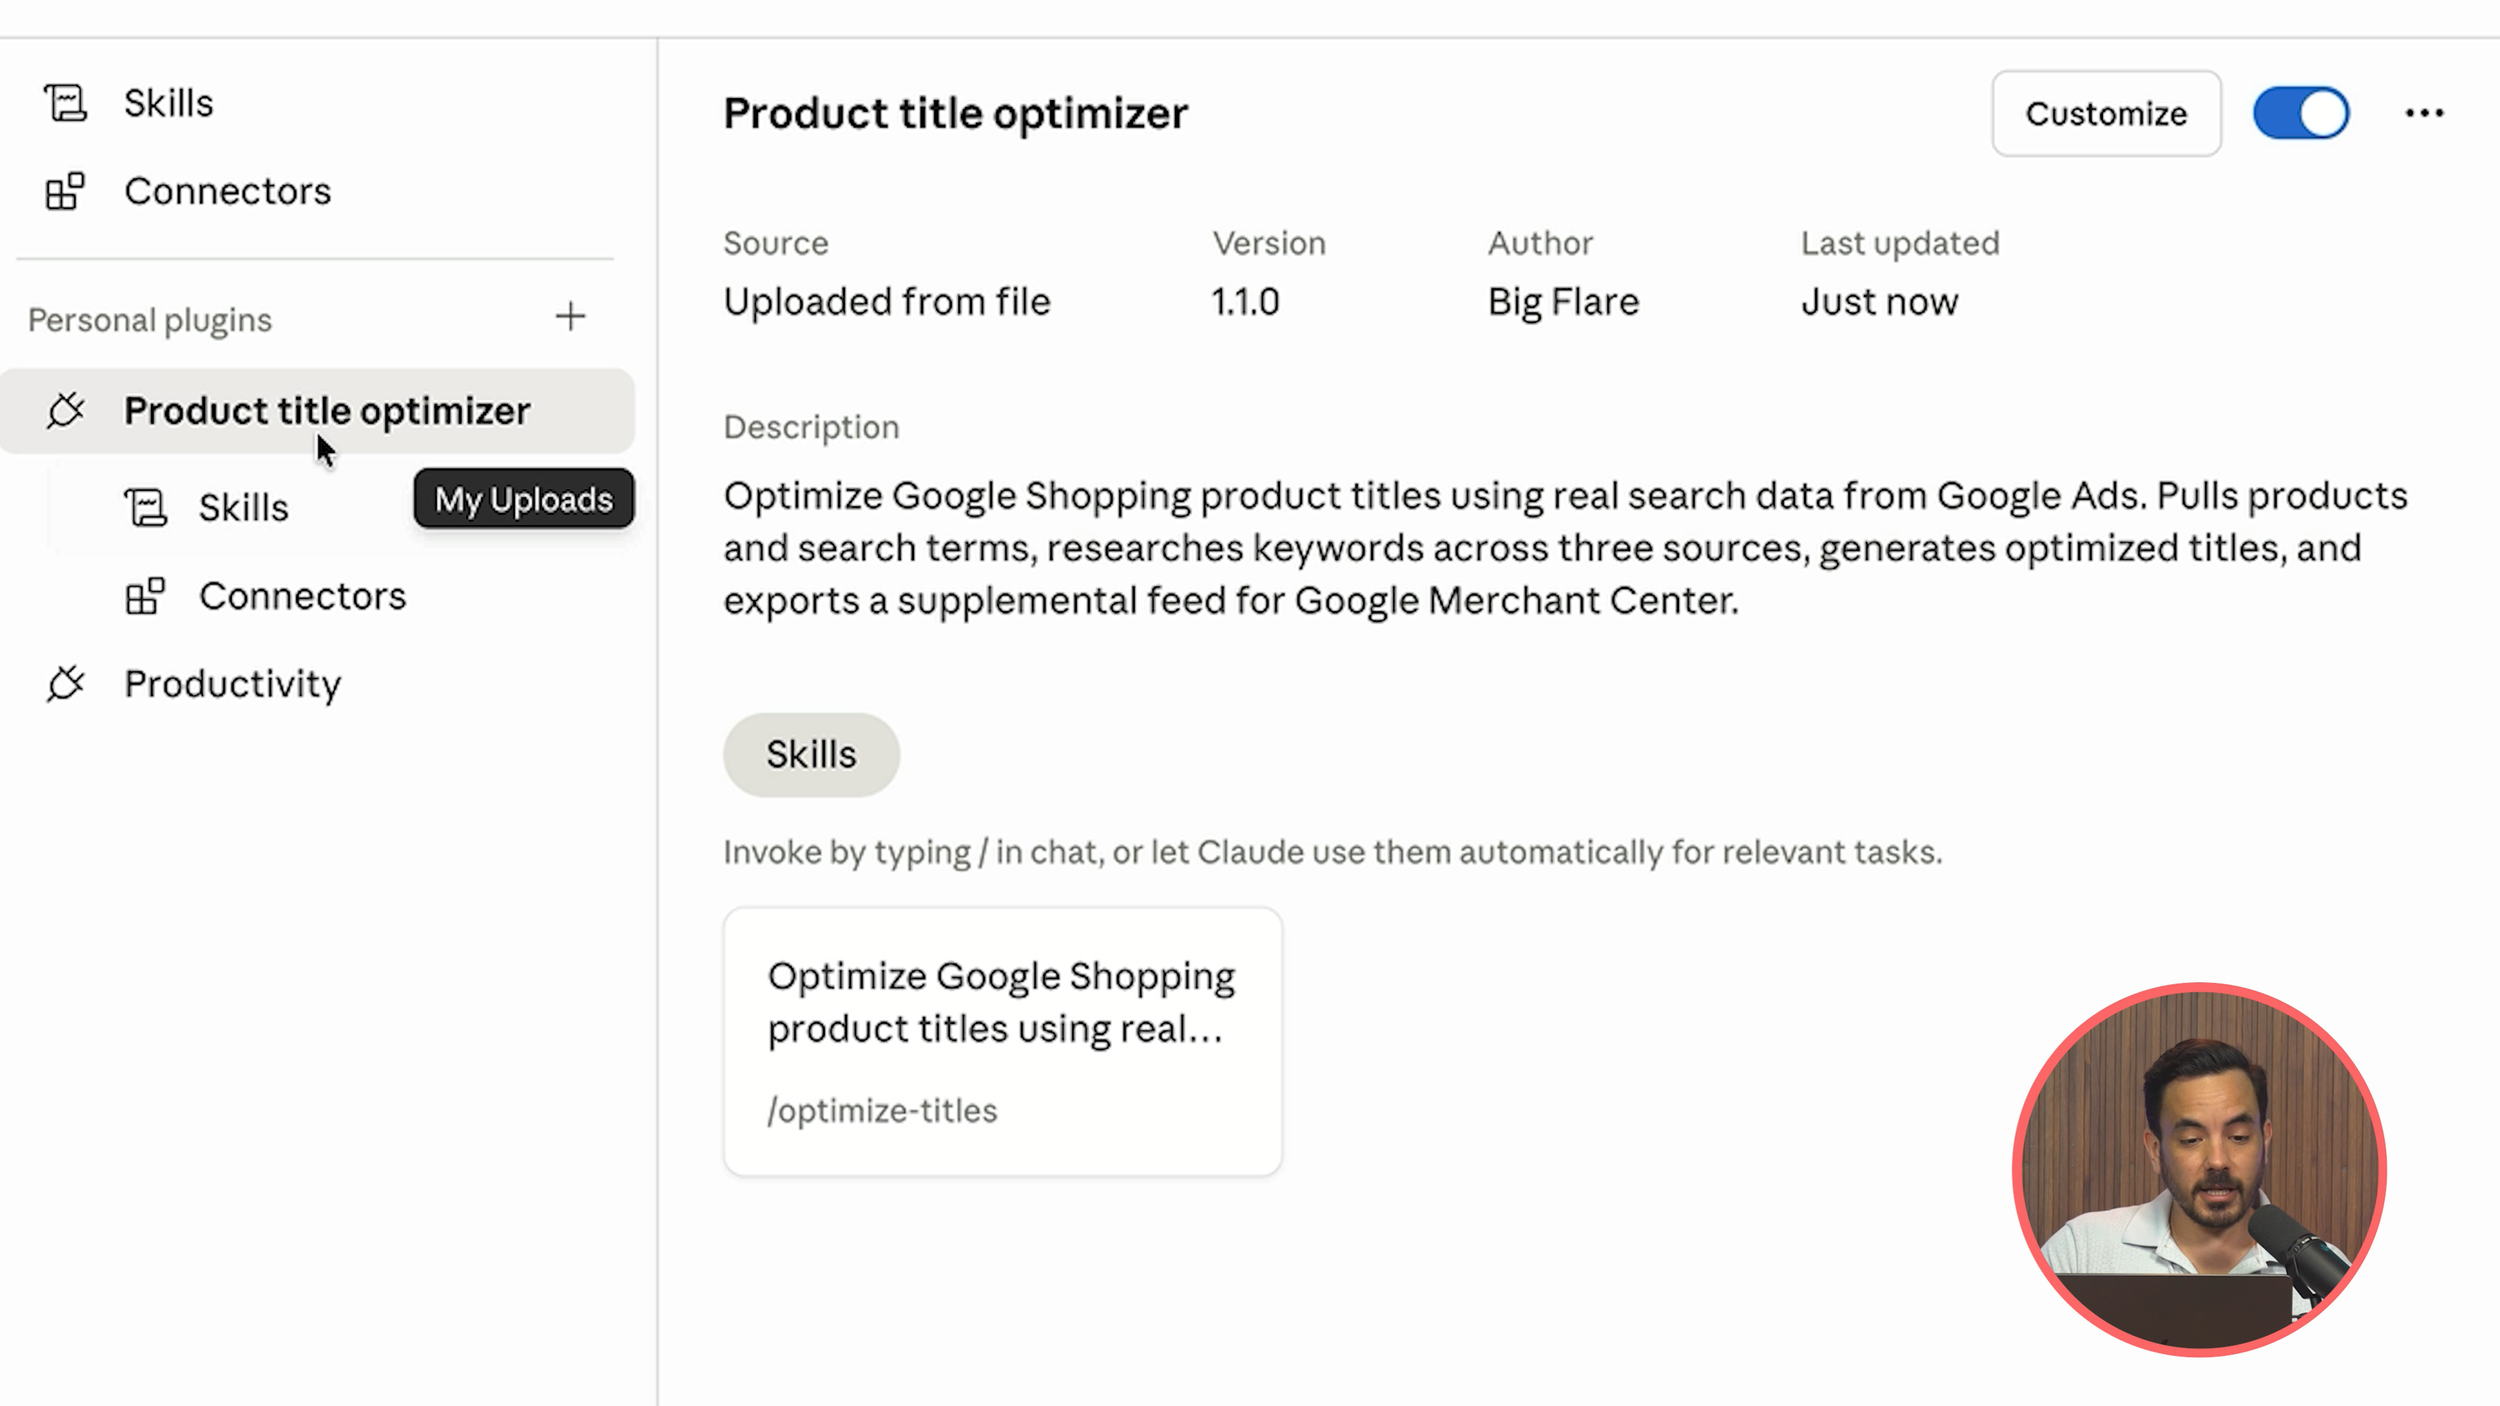
The plugin consists of two things: a skill and a connector. The skill is essentially a big prompt template I have already created for you (you can actually read the exact prompt if you want to review it in detail). The connector is for Go Marble.
Navigate to Connectors within the plugin settings and you will see the Go Marble connector packaged as part of the plugin. Click Install, then Add, then Connect. It will take you to a web page where you are already logged into Go Marble. Once connected, click the link to return to Claude, and you should see all the tools listed, confirming everything is connected and ready.
Step 5: Run the Optimiser
Back in the Cowork chat box, type something like:
"Optimise my product titles using the Product Title Optimiser skill."
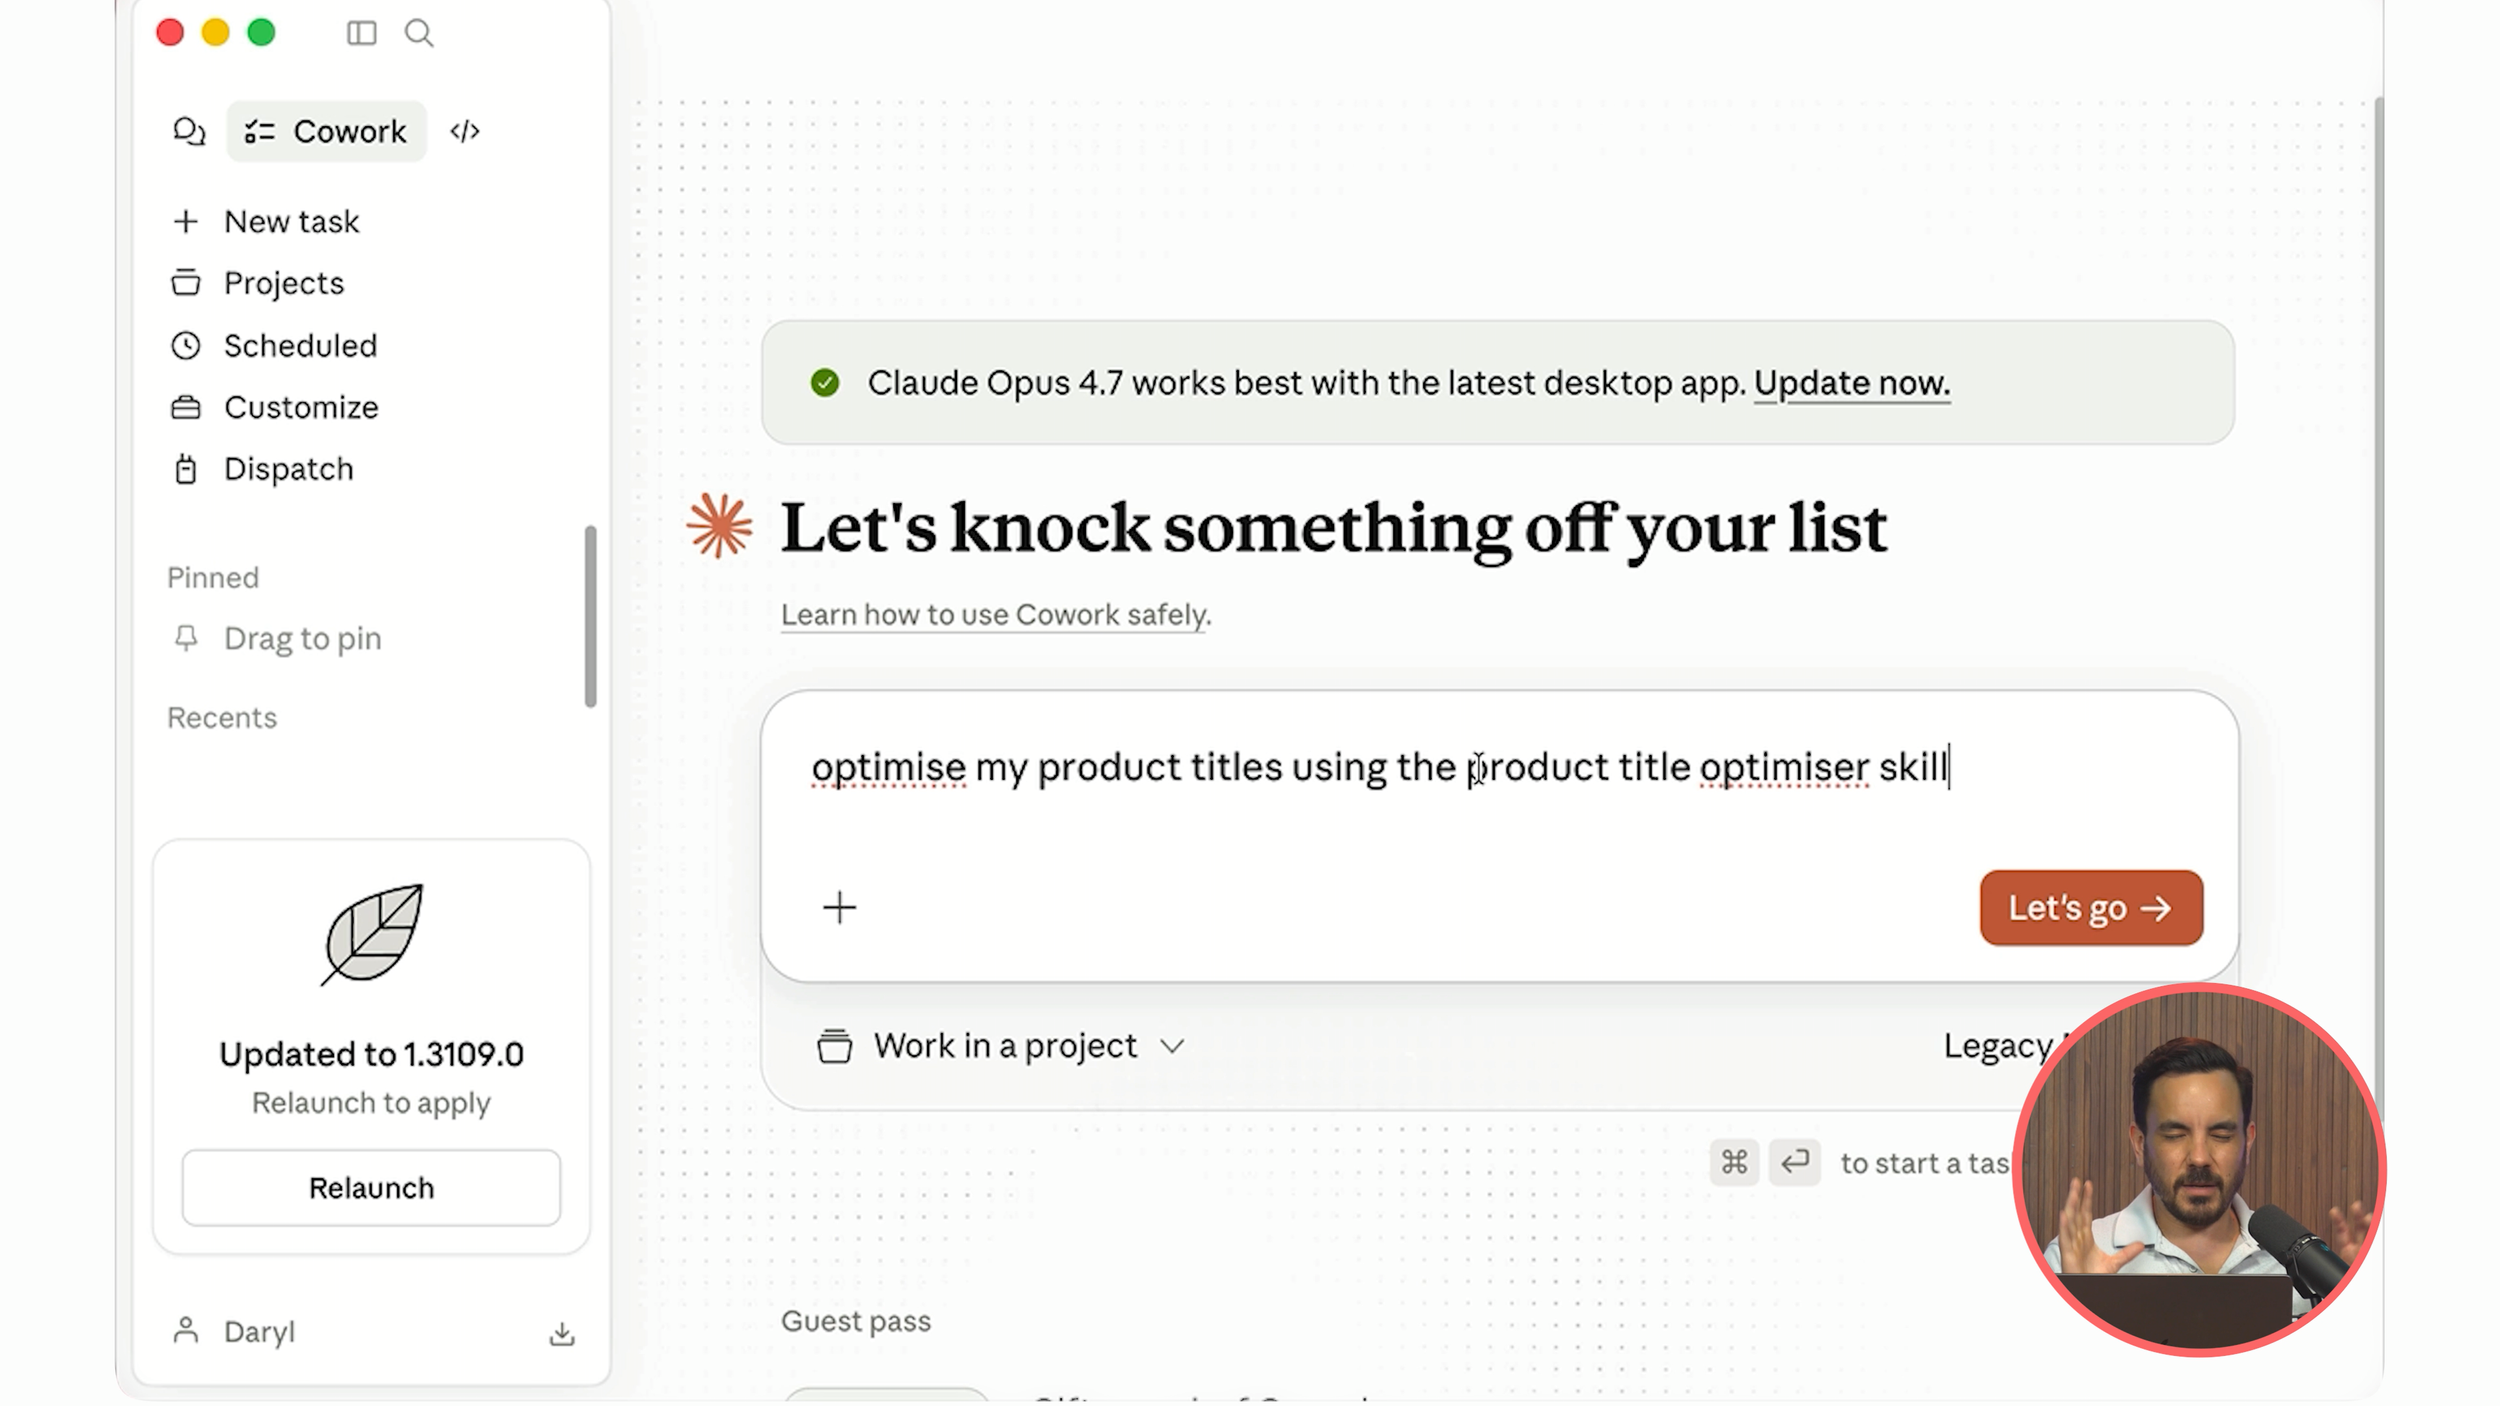
I do recommend explicitly mentioning the skill by name. Very rarely, if you just say "do this task" without specifying the exact skill, the AI agent might try to tackle it without using the pre-programmed skill, and you want it using the proper workflow I built.
Click go, and off it runs.
What Happens Behind the Scenes
The agent works through a detailed task list:
Connects to your Google Ads account
Pulls your products and search terms from Google
Researches keywords using the Keyword Planner tool in Google Ads
Browses your website to research your products (if website browsing is blocked, it falls back to web search instead)
Saves working files for you to review
After a minute or two, it will ask you how many products you want to optimise. It tells you how many it found in your product feed and lets you choose.
I have configured this to work well for up to about a thousand products in one go, though that will take around 10 minutes. My recommendation for a quick, impactful 80/20 optimisation: just pick the top 50. In the video example, the top 50 products accounted for 91% of all shopping clicks. So even optimising a fraction of your catalogue can deliver outsized results.
Reviewing the Results

Once the agent finishes (be patient; 5 to 15 minutes depending on volume, and keep an eye on your machine as it may ask for permission to access certain tools), you will find two files:
Product Title Reference is the important one. Open it in Excel and you will see your original titles alongside the optimised versions. The difference is usually dramatic. In the video example, the original titles were really short with very few keywords. The new titles packed in loads more relevant keywords: things like "petrol whipper snipper, line trimmer, string trimmer, heavy duty petrol whipper snipper for garden and lawn" plus the brand name at the end.
Product Title Research is the supporting file. It contains all the research Claude performed: product summaries, target audience analysis, key benefits, positioning notes, and full keyword research. In one example, it researched around 250 keywords across multiple sources, including AI-generated keywords and keywords pulled directly from Google Ads Keyword Planner.
If you want to change anything, just edit column C (the optimised title) directly in the Excel file, save it, and Claude Cowork will see your edits since it accesses the same file.
Exporting and Uploading to Google Merchant Center
Once you are happy with the titles, go back to Claude Cowork and simply type "export". It will take the approved product title file and generate a supplemental product feed ready for Google Merchant Center.
This supplemental feed contains just two columns: ID and Title. When you upload a supplemental feed, it overrides only the specified fields (in this case, titles) from your primary feed. Everything else in your primary feed stays completely untouched.
Here is how to upload it:
Head to Google Merchant Center
Click Data Sources
Click Supplemental Sources
Select Add product data from a file
Click Upload file from your computer and select the product feed file
Use the dropdown to select your main primary data feed
Click Create Data Source
You will see a confirmation screen showing how many products were updated and matched. If there are any errors, you can literally copy the error message, paste it into Claude Cowork and say "there was an error with a couple of products, here is the error message, please fix" and it will sort it out for you.
Once the supplemental data feed is uploaded, your new titles will be written into your Google Shopping ads within 24 hours.
Why This Matters
I have been running my Google Ads agency, Big Flare, for over 13 years now. I have worked with hundreds of ecommerce companies, and product title optimisation is something I do on every single client account because the impact is that significant. The Product Title Optimiser automates what used to be tens of thousands of dollars worth of manual work into a process that takes minutes and costs nothing.
Now, go sort out those product titles.
Conclusion
Product titles are the most critical factor in Google Shopping performance, and optimising them at scale has traditionally been a time-consuming, manual process. The free Product Title Optimiser plugin for Claude Cowork changes that entirely. By connecting to your Google Ads data via Go Marble, it pulls real search term data, conducts keyword research across multiple sources, and generates optimised titles automatically. The setup process involves downloading Claude Desktop, installing the plugin from GitHub, connecting Go Marble as your data bridge, and running a single prompt. Results are delivered as reviewable Excel files, and the final output is a supplemental feed ready for direct upload to Google Merchant Center. The whole process takes minutes rather than days, and every step from research to export is handled by the AI agent.