
Today, I’m showing you a game-changing Google Ads campaign structure that we use across loads of ecommerce client accounts at my agency, Big Flare.
This structure has helped us generate over $150 million in ecommerce revenue, and it’s simple to implement once you understand how it works.
I call it the ROAS-based 4 Campaign Structure, and it works beautifully for both Performance Max and Standard Shopping campaigns.
Let’s jump right in.
What’s Wrong With Your Current Campaign Structure?
Most advertisers lump all their products into one campaign.
Sound familiar?
Here’s what happens:
You have some super profitable products doing brilliantly.
But Google is also spending a ton on underperformers.
The campaign might hit your average ROAS target, but you’re likely making a loss on a chunk of your products.
Why? Because Google’s only trying to hit your campaign average ROAS target — not make every product profitable.
👉 This means some products are dragging the others down and quietly bleeding your ad budget.
So we fix that by splitting your products into four buckets based on ROAS and spend thresholds.
The 4 Campaign Structure: Profitable, Costly, Flukes, Zombies

You’ll create four separate campaigns, each focused on a different tier of product performance:
1. Profitable
Products with high ROAS and high spend.
These are your best performers. You want to give them more budget and scale them.
2. Costly
Products with low ROAS but still high spend.
These are burning your budget with little return. Keep a close eye.
3. Flukes
Products with promising ROAS but low spend.
They might be great — but haven’t spent enough to know for sure yet.
4. Zombies
Products with zero spend.
They’re invisible. Google isn’t even testing them. But they could be winners if you give them a chance.
Each of these gets its own campaign.
Why?
Because this gives you control to adjust budgets and bidding strategies for each tier.
How to Define the Buckets
You’ll need to set a ROAS threshold and a cost threshold.
If you’re not sure what to use, start here:
ROAS Threshold: 300%
Cost Threshold: $20
Date Range: Last 90 to 120 days
From there:
Profitable = Above ROAS threshold AND cost threshold
Costly = Below ROAS threshold AND above cost threshold
Flukes = Below cost threshold (regardless of ROAS)
Zombies = $0 cost (no impressions, no clicks)
Why This Structure Works (And Why It’s Better Than One Campaign)
In a typical campaign, here’s what usually happens:
The few profitable products raise the average ROAS.
Google then allows costly products to keep spending, even if they’re underperforming.
Most of your spend ends up on products that aren’t making you money.
Meanwhile, your profitable products often get underfunded.
When you separate them:
You can increase spend and lower ROAS targets for profitable products (to scale further).
You can reduce bids and budgets for costly products (to stop the bleeding).
You can test your flukes and zombies properly (and move the good ones into the right campaigns).
Real Example From a Client Account

Here’s what we found when we ran this report on a real ecommerce account with 7,000+ SKUs:
Profitable: 84 products. Generated 18k/month profit. But Google only spent $3.5k/month on them.
Costly: Took up over 50% of total ad spend. Only delivered $235/month in profit.
Flukes: Thousands of products with a few dollars in spend each — not enough to make any smart decisions.
Zombies: Roughly 50% of products got zero impressions, clicks, or spend.
How To Segment Your Products (Without Fancy Tools)
Go to All Campaigns → Products Tab in Google Ads.
Set filters:
ROAS > 3.0
Cost > $20
Date Range = 90–120 days
Export filtered product list to Google Sheets.
Label each group accordingly:
Profitable
Costly
Flukes
Zombies (cost = 0)
Add these labels as custom labels in your product feed.
Create new campaigns and use those custom labels to target each bucket.
Budget and Bidding Recommendations for Each Campaign
Profitable
Increase budget
Lower ROAS target (e.g. from 800% to 400%) to scale spend
Costly
Decrease budget
Raise ROAS target (e.g. from 100% to 250–300%) to filter out poor performers
Flukes
Keep ROAS target off
Increase budget OR reduce number of products to concentrate spend
Zombies
Add minimal budget ($50–$100/day)
Use Maximise Conversions or Maximise Conversion Value (no ROAS target)
Transitioning Your Campaigns: Two Approaches
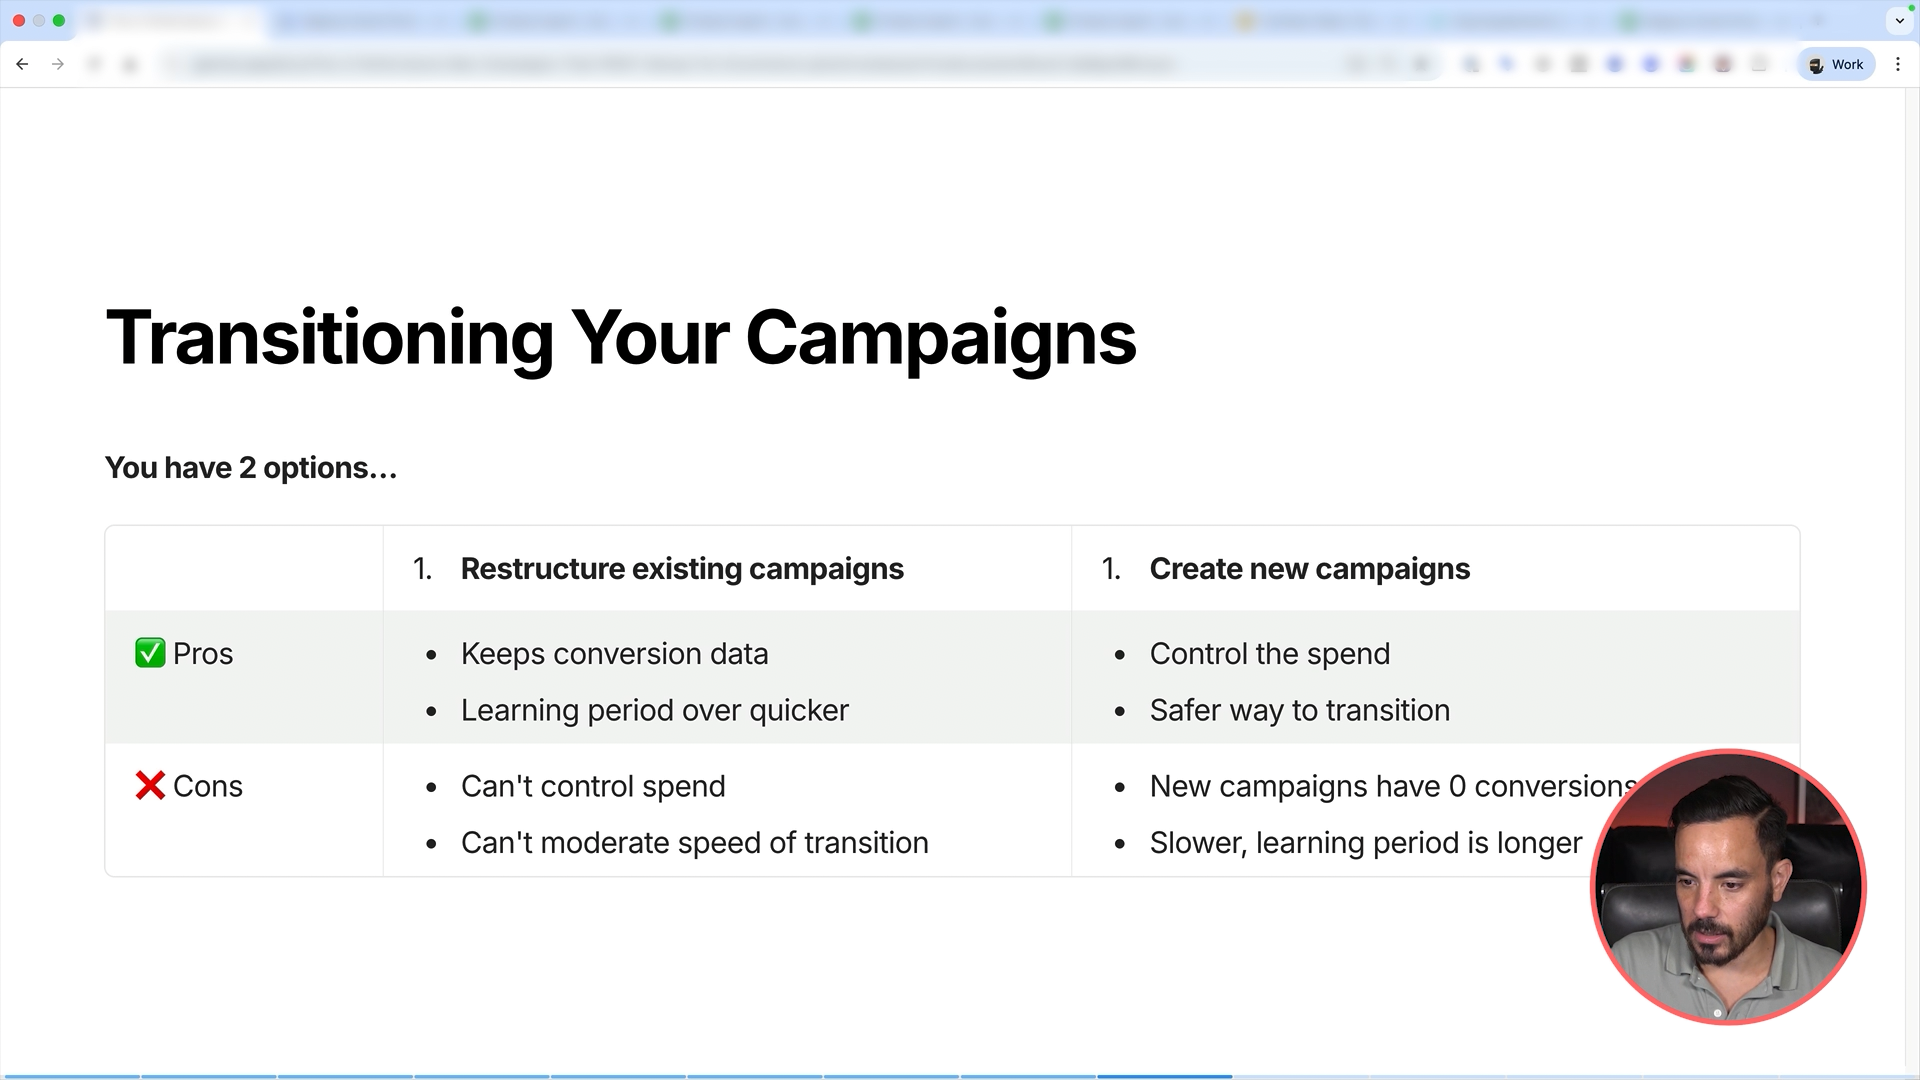
You’ve got two options:
1. Restructure Your Existing Campaigns
Keeps conversion data.
Faster learning period.
But more volatility, since changes apply instantly.
2. Create New Campaigns
Lets you control the transition.
Slowly shift budget from old to new structure.
Safer and more stable.
But new campaigns start with zero data and slower ramp-up.
I tend to lean toward the second option for most clients — it gives more control, especially when budgets are tight or you're risk-averse.
How Often Should You Refresh the Campaign Buckets?
You’ll want to update product tiers regularly:
Monthly refresh: Best if you have high conversion volume.
Quarterly refresh: Safer for smaller accounts or if you’re doing it manually.
Avoid refreshing weekly unless you’ve got automation tools, it’s too volatile.
What About Asset Groups?
Simple is best.
For each campaign, just mirror the same asset group structure:
One asset group per product category (e.g. Supplements, Fish Oil, etc.).
Optionally break out best sellers into their own asset group.
Wrapping It All Up
Want to save time?
There are third-party tools that can automate all of this for you — reporting, labelling, refreshing, everything.
We use a few at Big Flare, but this structure works fine manually too — just takes a bit more elbow grease.
This structure works because it:
Gives you full control over how much you spend on each product type.
Fixes inefficiencies that Google’s automation can’t.
Increases profitability without increasing ad spend.
You’ll move spend away from the losers, and towards the winners.
That’s the whole game, really.
Summary
If you're running a Google Ads account for ecommerce, chances are high that Google is over-spending on your worst products and under-spending on your best ones. This newsletter introduced a four-campaign structure — Profitable, Costly, Flukes, and Zombies — designed to fix that imbalance.
By segmenting products based on ROAS and spend, you gain control over budgets and bidding per performance tier. Profitable products get scaled, costly products get reined in, and hidden gems (flukes and zombies) get tested properly.
This structure works for both Performance Max and Standard Shopping and can be implemented manually or automated with third-party tools. You can restructure your current campaigns or transition slowly with new ones — both approaches have pros and cons. A monthly or quarterly refresh of the tiers is recommended.
Done right, this approach will raise your overall ROAS and make your campaigns much more profitable — without needing to spend more.